Make a Cheap, Eco-Friendly Floor Surface with Paper
What it Takes to Do This Job
Estimated time: One week to complete a large room (or up to a month if you work only evenings)
Estimated cost: About $325 for a large room (less than $1 per square foot!)
Required skill level: No prior experience needed
A Cheap, Green Choice for Flooring
When you're refinishing a room from top to bottom, you may find that the bottom—that is, the floor—is the most costly part of the job. According to the 2009 Consumer Reports Buying Guide, you can expect to pay up to $15 a square foot (including installation) for wood or tile floors. Even the cheaper options, such as vinyl and laminate, start at $3 a square foot. And if you're interested in green flooring choices, such as bamboo, cork, and natural linoleum, you may have to pay even more.
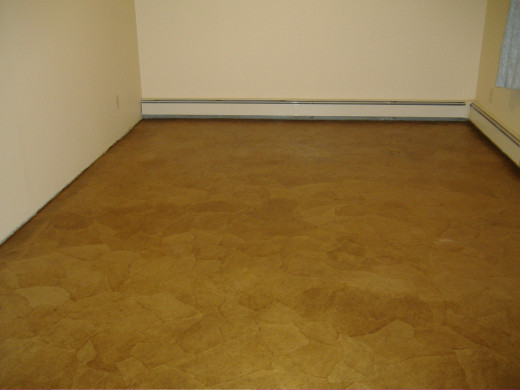
Is there a cheap, yet green alternative? The answer, if you're not afraid to tackle a DIY project, is an emphatic yes. With a roll of brown kraft paper and a few gallons of water-based polyurethane, you can create a fascinating faux-stone floor that puts carpeting to shame.
What Are You Looking For in a Floor?
I'm looking mainly for flooring choices that are:
Advantages of Brown Paper Flooring
Brown paper floors have a lot going for them. First of all, they have an attractive and quite unusual appearance. Some folks think they look like natural stone, while others have compared the look to distressed leather. They feel as good as they look, too. A layer of paper can help insulate a cold concrete floor or a drafty wooden one, and it's quite soft under bare feet.
Second, a DIY paper floor is quite inexpensive. It requires no special equipment or skill to install, so you can do the whole job yourself and save on installation fees. The job is time-consuming, but not difficult. If you have a large area of floor to cover, you don't have to do it all in one day; you can work on it bit by bit, picking up each day where you left off. You also save money by eliminating the need for a subfloor. Because you're attaching the paper directly to the floor, it doesn't have to be perfectly flat and even.
Finally, paper is an environmentally friendly flooring choice. It uses much less material overall than most types of flooring, and no materials that have to be mined and shipped from a long distance away. You can make your paper floor still more eco-friendly by choosing recycled paper and a low-VOC, water-based polyurethane. Hardcore recyclers can even try this project with old paper bags, although kraft paper will produce neater results.
What You Will Need
Making a paper floor takes just a few basic materials, all of which you can find at home improvement stores like Home Depot or Lowe's.
- Kraft paper. A large roll costs about $40 and measures about 2,500 square feet, which is enough to cover 2,000 square feet of floor space with a generous margin for overlap between pieces.
- Water-based polyurethane. (This may also be labeled as "polycrylic" or "water-based, oil-modified polyurethane.") You may have heard that traditional oil-based polyurethane is more durable, but for this job, the water-based finish is definitely better. First of all, it doesn't produce noxious fumes that could easily sicken you in an enclosed area. Second, it's much easier to clean up; all you need is soap and water, rather than nasty solvents that require special disposal. And finally, it dries a lot faster, which means the whole job can be done in less time. It costs about $50 a gallon, which would normally be enough to cover about 400 square feet. However, the initial stage of the job (laying down the paper pieces) uses a lot of poly, so you will probably need about twice the normal amount to cover the whole floor. Thus, for a 400-square-foot room (20 by 20 feet), figure on at least two gallons.
- Paintbrushes. We found an inexpensive foam brush to be ideal, but if you already have regular bristle-type paintbrushes, they should work as well. As often as not, you will be sticking the paper down with your hands anyway, which is why you will also need...
- Gloves. Cheap latex or nitrile ones are ideal, because you need to be able to feel what you're doing. Make sure to get several pairs: this is a project that could easily take you several days to finish, and the gloves will get so coated in gunk that you won't want to reuse them.
- A long-handled "floor finish applicator." This looks like a mop, but in place of the standard sponge or rag head, it has a soft synthetic pad resembling sheepskin. This is the ideal tool for applying the finishing coats, and it will only set you back $12 or so.
How to Install Your Paper Floor
- Remove everything from the room, and clean the floor thoroughly.
- Get into your oldest, grubbiest clothes, because you will end up covered in polyurethane.
- Tear—don't cut—your brown paper into irregular pieces. The raw edge is important to give your paper floor a natural look. (Pieces torn from the edges of the roll will have one straight edge; these can be used along the edges of the room to line up neatly with the walls. If you end up with too many edge pieces, just tear off the edges.) Six-to-eight-inch squares are a reasonable size to work with, but you can make them larger or smaller if you wish.
- Crumple each piece thoroughly, then flatten it out again. This creates "veins" in the material that will absorb the poly and give the paper a textured look.
- Start laying down your pieces. (To avoid painting, or papering, yourself into a corner, start at the side of the room farthest from the entrance, and work your way backward.) Using a brush, coat the back of each piece with your poly. Then put some more poly down on the floor where you want the piece to go. Lay the piece down in the spot you've chosen and add another coat of poly on top of it. Finally, smooth it with your hand to flatten it down. (See why it was a good idea to wear gloves for this?)
- After putting down each piece, select another that will fit well against it. Fitting the irregular pieces together is kind of like doing a giant jigsaw puzzle: try to line up the edges to avoid leaving bare patches without too much wasteful overlap between pieces. However, if you do find yourself leaving gaps, don't worry; just tear a piece of paper to the needed size to cover the space.
- As the pieces dry, they may start to pucker and form bubbles, so keep an eye on them and be prepared to add a little more poly and smooth them down again if necessary.
- Once you've got the whole floor covered (or when you want to leave off work for the day), you can clean yourself and your brushes up with soap and water.
- Leave the entire floor to dry for at least two hours before putting down your finish coats with the long-handled applicator. Pour a small puddle of your water-based poly directly onto the floor, then spread it out with the applicator just as if you were mopping. Once again, start at the far side of the room and work your way back toward the entrance, being careful to cover every part of the floor.
- After each coat of poly, give the floor a couple of hours to dry. To protect your unique floor, you'll want at least three coats of finish, and possibly as many as six.
- Once the floor is completely laid and sealed, you can finish it off with some moulding around the edges.
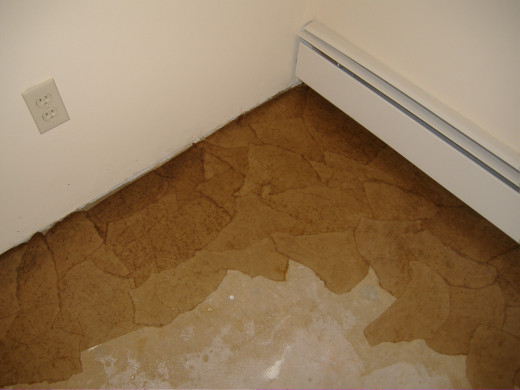
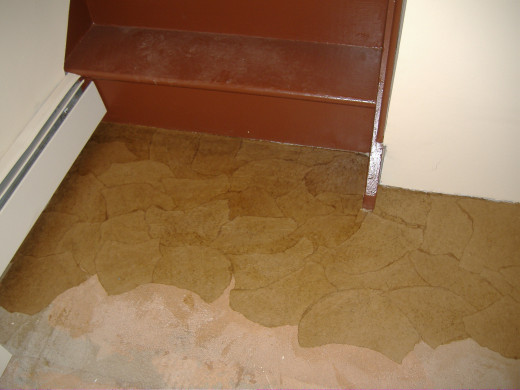
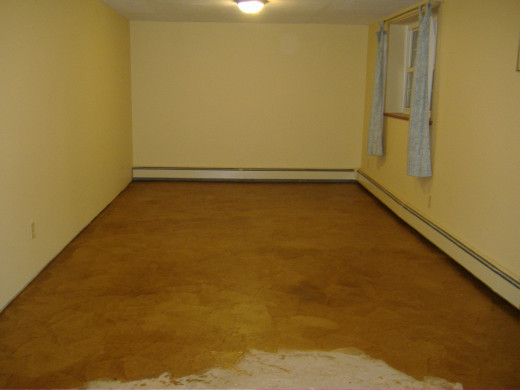
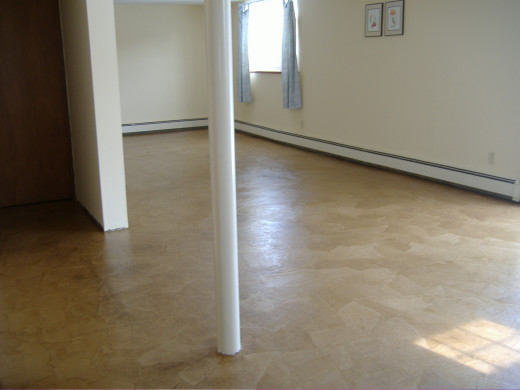
How it Will Look (the Work in Progress)
Caring for Your Paper Floor
A paper floor is easy to care for. Just sweep and damp-mop it as needed. If it starts to look dull after a few years, just add another coat of your water-based finish. If it becomes torn or damaged, you can easily patch it by laying down a new piece of kraft paper just the same way you did when you first put down the floor.
© 2014 Amy Livingston

